Summary
If you are using PagerDuty, you can have an Amplifier Engagement create a PagerDuty alert which allows teams to respond to incidents faster, more consistently, and with less manual effort. By tying PagerDuty alerts to an ACTION you can escalate issues to the right team to reduce response times, eliminate repetitive tasks, and ensure a standardized approach to incident remediation.
Once the ACTION is created, you can reuse it to escalate alerts to the right teams using pills such as Action Button, Triage, Launch Actions & Resolution Expiry Actions.
IMPORTANT NOTES
- Since we do not have a way to map Amplifier criticality to PagerDuty issues criticality, the customer may want to set up a seperate PagerDuty action for each severity level; e.g. Send to PagerDuty - Critical, Send to PagerDuty - Medium etc.
- Rather than a unique URL PagerDuty provides a routing key which determines which PD account receives the call. This key is included as part of the JSON payload.
Creating the Amplifier Action
- In Amplifier, click on Engagement Studio on the left navigation menu and then click Actions on the top menu.
- You will get a list of Action Templates where you will find PagerDuty. Click on it to load the PagerDuty template.

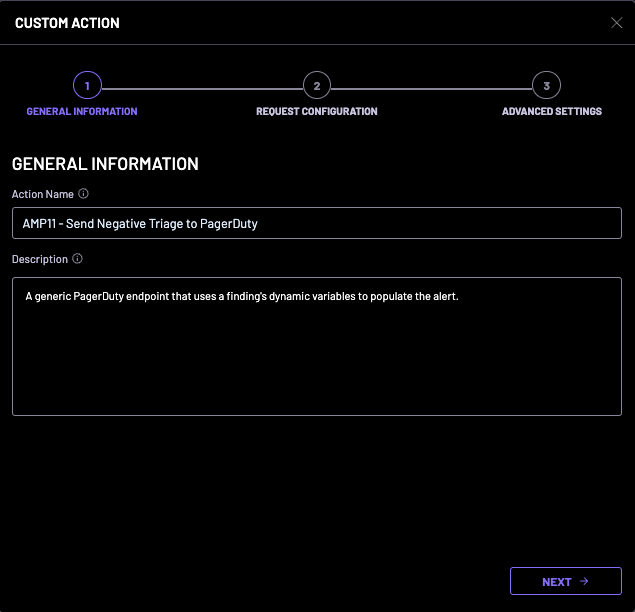
3. Name the Action and provide a Description. Click Next to go to the next step.
4. Here we will configure the payload to PagerDuty.
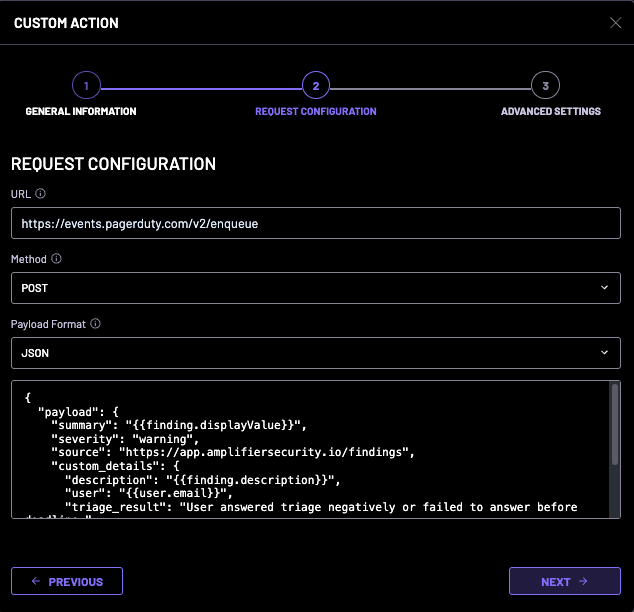
URL: https://events.pagerduty.com/v2/enqueue (same for all PD accounts)
Method: POST
Payload Format: JSON
In the payload body we can use any dynamic variables that are passed to the action from the finding or user details.
As noted previously, the severity is not mapped from Amplifier’s severity rating, and must be manually configured. We should look at facilitating mapping in the future.
Required fields for the incident include:
summary
severity
source
routing_key
event_action (will probably always be ‘trigger’ until / unless we add incident closure webhook functionality)
The custom_details section is used to add additional information for the PagerDuty incident, and is optional.
{
"payload": {
"summary": "{{finding.displayValue}}",
"severity": "warning",
"source": "https://app.amplifiersecurity.io/findings",
"custom_details": {
"description": "{{finding.description}}",
"user": "{{user.email}}",
"triage_result": "User answered triage negatively or failed to answer before deadline."
}
},
"routing_key": "<pagerduty routing key>",
"event_action": "trigger"
}
Once completed click Next to go to the final configuration screen.
5. Ensure that the Accept and Content-Type headers are set to application/json.
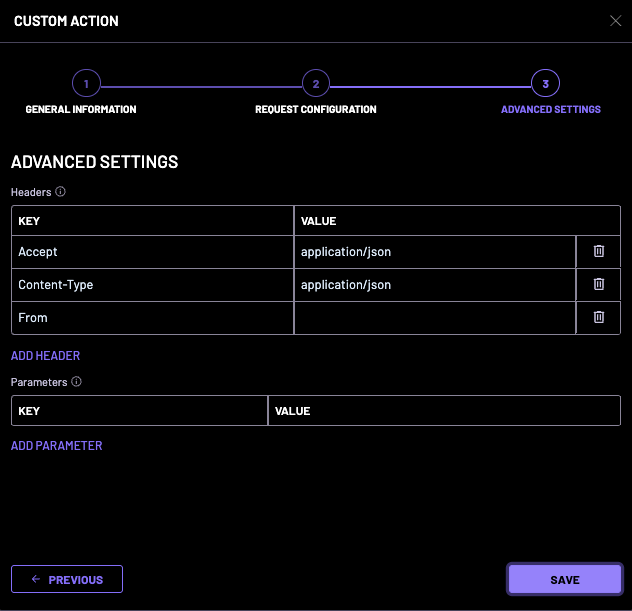
Finally, ensure that the Accept and Content-Type headers are set to application/json, and save the action.
Was this article helpful?
That’s Great!
Thank you for your feedback
Sorry! We couldn't be helpful
Thank you for your feedback
Feedback sent
We appreciate your effort and will try to fix the article